


Understanding the Basics of Car Maintenance
Owning a vehicle comes with the responsibility of keeping it in optimal condition. Basic car maintenance not only extends the lifespan of your vehicle but also ensures safety on the road. By familiarizing yourself with routine tasks, you can prevent costly repairs and stay ahead of potential issues.
According to industry data, regular maintenance can improve fuel efficiency by up to 15% and reduce breakdowns by nearly 50%. Starting with simple tasks allows beginners to build confidence while saving money. The goal is to create a habit of checking key components regularly and addressing minor issues promptly.
Tools You Need for Basic Car Maintenance
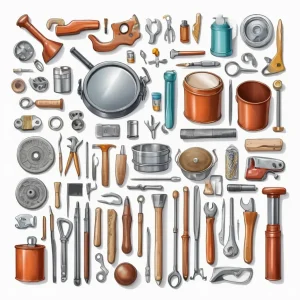
Essential Tools List
- Car jack and jack stands
- Socket set and wrenches
- Screwdrivers (flathead and Phillips)
- Oil filter wrench
- Funnel
- Drain pan
- Gloves and safety glasses
- Tire pressure gauge
- Rags or shop towels
Optional but Useful
- Car battery tester
- Coolant tester
- Wire brushes
Besides possessing the right tools, understanding their proper use is crucial. Investing in quality tools ensures safety and efficiency, making your maintenance routine smoother and more reliable.
Step 1: Checking and Changing Engine Oil
Engine oil is vital in lubricating moving parts, minimizing wear, and maintaining optimal engine temperature. Checking the oil level is straightforward: locate the oil dipstick, pull it out, wipe it clean, re-insert it, and then pull it out again to check the level.
If the oil is low or dirty, it’s time for an oil change. To do so, warm up the engine briefly, then lift the vehicle using a car jack and secure it with jack stands. Place a drain pan under the oil sump drain plug, unscrew it carefully, and let the oil drain completely. Replace the drain plug, remove the old oil filter with an oil filter wrench, and install a new filter. Fill the engine with the recommended grade of oil, check the level again, and reset the oil change indicator if applicable.
Pro Tip: Always dispose of used oil responsibly—never pour it down drains or onto the ground.
Step 2: Inspecting and Replacing the Air Filter
The air filter prevents dirt, dust, and debris from entering the engine. Over time, it becomes clogged and reduces engine efficiency. To inspect, locate the air filter box—usually a large plastic or metal casing on top of or beside the engine.
Open the box, remove the filter, and examine it. If it’s dirty or clogged with debris, replace it. A clean air filter can improve fuel economy by 10% and engine performance. Installing a new filter is straightforward: simply place it in the box and secure the lid tightly.
Visuals can help identify when a filter needs replacing, but checking every 12,000 to 15,000 miles is a good rule of thumb.
Step 3: Checking Tire Pressure and Tread
Proper tire maintenance is crucial for safety, fuel efficiency, and tire longevity. Use a tire pressure gauge to check each tire’s pressure regularly, ideally once a month and before long trips. Compare the readings to your vehicle’s recommended PSI, usually found in the owner’s manual or on a sticker inside the driver’s door frame.
Under-inflated tires can decrease fuel efficiency and increase tire wear, while over-inflation can cause a harsh ride and uneven wear. Additionally, inspect the tire tread for signs of wear or damage—use a penny to check tread depth; if it’s less than 2/32 inch, it’s time to replace.
Keep in mind that maintaining proper tire pressure can improve fuel economy by up to 3%, saving you money over time.
Step 4: Checking and Replenishing Coolant
The cooling system prevents the engine from overheating. Locate the coolant reservoir, which is typically a translucent tank with marked “Full” and “Low” levels. When the engine is cool, check the level; if it’s low, top it off with the appropriate coolant mixture.
Flushing and replacing coolant should be done approximately every 2-5 years or as specified by your vehicle manufacturer. To do this, drain the old coolant from the radiator, flush with clean water, then refill with fresh coolant mix. This prevents corrosion and maintains efficient cooling, extending engine life.
Step 5: Inspecting and Replacing Battery
A reliable battery is essential for starting your vehicle and powering electrical systems. Visual inspection involves checking for corrosion on terminals (white or bluish deposits), cracks, or leaks. Clean corrosion with a mixture of baking soda and water, using a wire brush.
If your vehicle has difficulty starting or the battery is more than three years old, consider having it tested with a battery tester. Replace the battery if it shows signs of weakness or if it’s old. Secure the new battery properly, connect the terminals, and ensure no corrosion remains.
Maintaining your battery can prevent unexpected breakdowns, especially during winter months.
Conclusion
Mastering the basics of car maintenance empowers vehicle owners to take control of their vehicle’s health, reduces repair costs, and enhances safety. Starting with simple tasks like oil changes, air filter replacements, and tire checks sets a solid foundation for more advanced maintenance as confidence grows. Remember, safety first—use proper tools, wear protective gear, and consult your vehicle’s manual for specific details. Regular inspection and maintenance are investments in your vehicle’s longevity and your peace of mind on the road.
My advice: Schedule a monthly vehicle check, even if it’s just a quick glance. Small issues caught early can save you big money and trouble down the line.
Q1: How often should I check my car’s oil level?
A1: Ideally, check your oil every month or before long trips. Regular checks help prevent engine damage caused by low or dirty oil.
Q2: When should I replace my air filter?
A2: Most manufacturers recommend replacing the air filter every 12,000 to 15,000 miles, but check it sooner if you detect reduced engine performance or see visible dirt.
Q3: How do I know if my tires need replacing?
A3: Check the tread depth using a penny—if the tread is less than 2/32 inch, it’s time for new tires. Also, watch for cracks, bulges, or uneven wear patterns.
Q4: What are signs that my car’s coolant needs to be replaced?
A4: If your engine overheats, the coolant looks rusty or contaminated, or it’s been more than 2-5 years since the last change, consider flushing and refilling the system.