

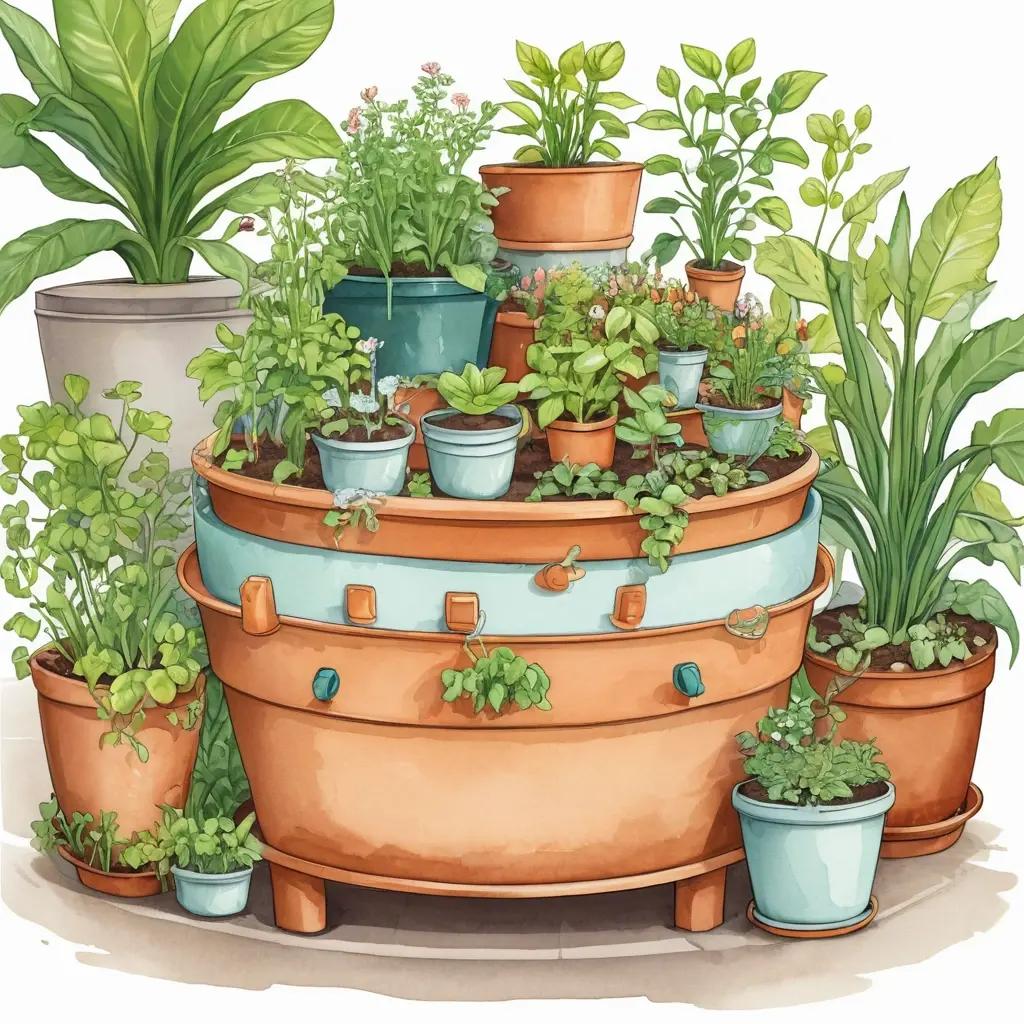
Introduction to Self-Watering Garden Planters
A self-watering garden planter is an innovative solution designed to reduce maintenance, conserve water, and ensure your plants receive consistent hydration. These planters are especially beneficial for busy individuals, beginners, or those with limited space. By incorporating a self-watering system, you can enjoy a lush, green space with minimal effort.
Constructed typically with a water reservoir beneath the soil, these planters use capillary action to draw moisture into the roots when needed. This mechanism helps prevent overwatering and underwatering, common issues faced by traditional containers. According to gardening studies, plants in self-watering systems can thrive up to 30% longer without watering compared to conventional pots, making them a cost-effective and eco-friendly choice.
Materials Needed for a DIY Self-Watering Planter
Creating your own self-watering planter requires a combination of accessible materials. Here’s what you’ll need:
- Large plastic or ceramic container (for the outer shell)
- Inner pot or container (to hold the soil and plants)
- Water reservoir or a large water container
- Wicking material (cotton rope or wicks)
- Cutting tools (scissors, utility knife)
- Drill (for creating drainage or water inlet holes)
- Optional: Landscape fabric or mesh (to prevent soil from clogging the water supply)
These materials are usually available at home improvement stores or garden centers, making the project straightforward and cost-effective.
Step-by-Step Guide to Building Your Self-Watering Planter
Constructing your self-watering planter involves several stages, each crucial for functionality and durability.
Step 1: Prepare the Outer Container
Begin by selecting a sturdy outer container that will serve as the water reservoir. Drill a small hole at the bottom to allow excess water to drain if necessary, but ensure it can retain enough water for your plants. If you’re designing a sealed reservoir, skip this step.
Step 2: Create the Inner Pot or Insert
Place the inner container that will hold the soil and plants inside the outer reservoir. This inner pot should be made of porous material if possible, to facilitate wicking. Ensure there’s enough space for the soil and roots, typically 2-4 inches from the top.
Step 3: Install the Wicking System
Cut a length of cotton rope or wicking material that extends from the water reservoir at the bottom to the soil surface. Insert one end into the water at the reservoir’s bottom and lay the other end into the soil of the inner pot. The wicking material will transport moisture from the water to the roots through capillary action.
Step 4: Add Soil and Plants
Fill the inner container with high-quality potting soil suitable for your chosen plants. Avoid overly nutrient-rich soils, as they can clog the wicking system. Plant your green favorites—herbs, succulents, or flowers—ensuring they have enough space and proper drainage.
Step 5: Fill the Reservoir and Test
Fill the outer reservoir with water, ensuring the wicking material is submerged. Check for proper water flow and avoid overfilling. Monitor the moisture levels over the next few days, adjusting the wick length or water level as needed.
Design Tips and Best Practices
When designing your self-watering garden planters, consider the following:
– **Size matters:** Larger reservoirs reduce the need for frequent refilling, ideal for periods away or busy schedules.
– **Material choice:** Use UV-resistant plastics or glazed ceramics for durability outdoors.
– **Plant selection:** Choose plants that thrive in consistent moisture and are compatible with container environments.
– **Maintenance:** Regularly check the water level and clean any debris or algae buildup to prevent clogging.
Author’s opinion:
In my experience, customizing your self-watering planters according to plant needs and climate conditions significantly enhances their efficiency and longevity. A bit of initial effort in setting up pays off in lush, low-maintenance greenery for months to come.
Advantages of Self-Watering Planters
Implementing a self-watering system offers numerous benefits:
– **Water Efficiency:** Reduced water usage by up to 50% compared to traditional watering methods.
– **Consistent Moisture:** Keeps soil at optimal levels, preventing plant stress.
– **Time Savings:** Less frequent watering means more time to enjoy your garden.
– **Reduced Overwatering:** Minimizes root rot and plant diseases.
– **Environmental Benefits:** Conserves water and reduces runoff.
Common Challenges and Solutions
While self-watering planters are excellent, they may present specific issues:
– **Clogging of Wicks:** Regularly check and replace wicking material if it appears clogged or deteriorated.
– **Algae Growth:** Use opaque containers and consider adding a small amount of algaecide safe for plants.
– **Water Stagnation:** Ensure proper drainage and avoid sealing the reservoir completely.
– **Plant Compatibility:** Some plants prefer dry roots; research your plant’s watering needs before choosing or planting.
Conclusion
Creating your own self-watering garden planter is an accessible project that can transform your green space into a low-maintenance oasis. By choosing the right materials and following careful design steps, you can enjoy healthy, thriving plants with minimal effort. Whether you have a small balcony or a backyard garden, a self-watering system enhances water efficiency, reduces daily chores, and supports healthy growth. Tailor the design to your plants and environment, and you’ll have a personalized green space that remains beautiful year-round with little supervision.
Q1: How often should I refill the water reservoir in a self-watering planter?
A1: Depending on the size of the reservoir and plant water requirements, refilling typically ranges from every 3 to 7 days. Monitor moisture levels regularly, especially during hot or dry weather.
Q2: Can I use any type of plant in a self-watering planter?
A2: Most plants thrive, but it’s best to select those that prefer consistent moisture, such as herbs, leafy greens, and some flowers. Plants that dislike wet roots, like succulents, may not be suitable unless the system is adapted accordingly.
Q3: How do I prevent algae growth in my water reservoir?
A3: Use opaque containers to block light, regularly clean the reservoir, and consider adding a small amount of safe algaecide or natural remedies like aquarium-safe treatments.
Q4: What size of water reservoir is ideal for a low-maintenance garden?
A4: Larger reservoirs (5 gallons or more) require less frequent refilling, making them ideal for low-maintenance gardens, especially if you’re away frequently or have multiple planters.
Q5: How long does a DIY self-watering planter typically last?
A5: With proper maintenance, quality materials, and occasional replacements of wicks or soil, a self-watering planter can last several seasons—often 2 to 5 years.